
Create a Lab
Setting up a laboratory space inside a Location.
A Laboratory is where we do our research, and it can contain a lot of things itself. It can have equipment, it can have chemical storage, it can have benches and carts and cabinets. We'll get to adding those later. For now, lets just create a lab.
To create a lab we go to the Labs page and click the "+" button in the top right. This will bring us to the lab creation page.
The lab is the basic level of organization, a lab must always have a name and be at a specific location. We'll create a cell culture lab on the 7th floor location we already created in the previous step.
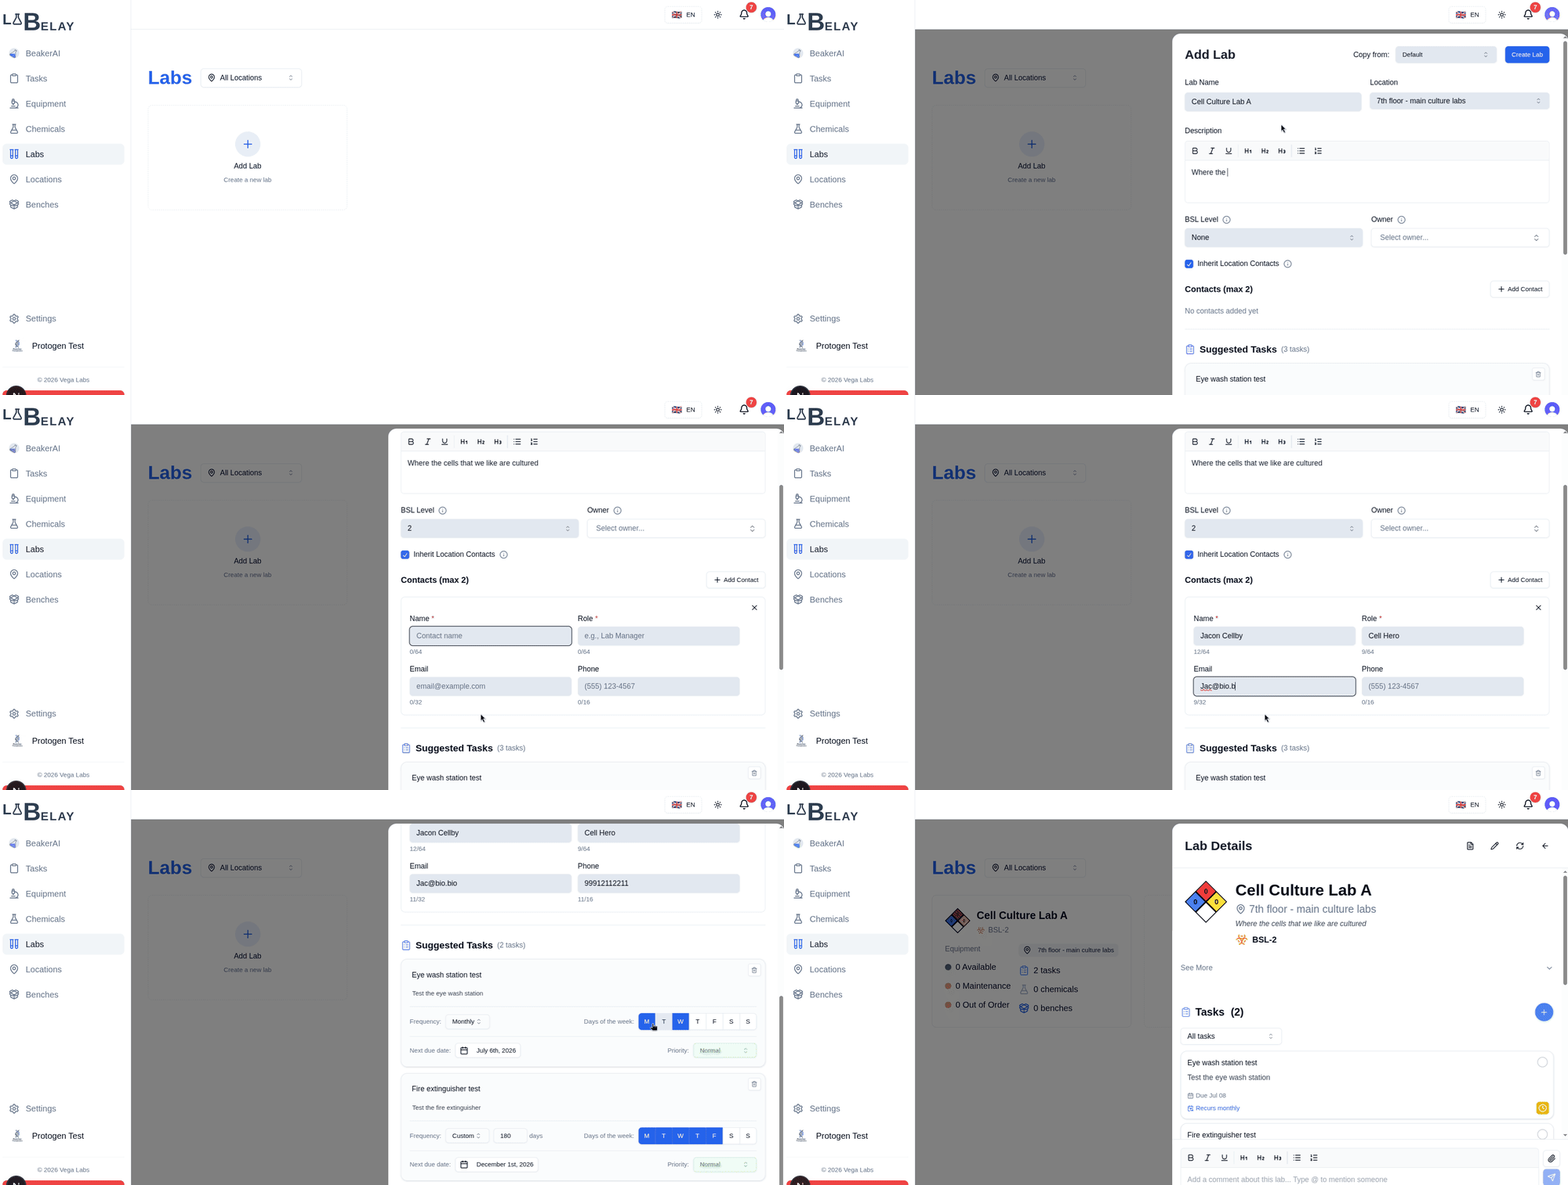
Let's discuss some of the specialized fields on the new labs page:
- Contacts: You are able to add specific contacts for each lab. There is a check box that instructs our system to include the contacts from the location as well. If you don't have lab specific contacts and would like to use the location contacts for your lab you can leave the "Inherit Location Contacts" selected and not add any additional contacts. If you add additional contacts with the Inherit option selected then we will merge both contacts lists. Finally you can uncheck the inherit option and use only the contacts specified for this lab.
- Suggested Tasks: LabBelay will suggest tasks that you may need to do for your lab. You can edit them or remove them here. For example we are being suggested to add a Fume Hood inspection, fire extinguisher inspection, and an eye wash station inspection. Let's remove the fume hood task and keep the rest. You can see we're able to modify or delete these. We can modify or delete them later as well as adding new tasks later - these are just some helpful suggestions.
- Copy From: - You can see at the top next to "Create Lab" there is a "Copy from" option that says "default". If you have set up other laboratories with tasks and configurations that you would like to duplicate then select the lab from the drop down, so if you have several cell culture labs and would like them to all have the same setup this allows you to do that. Since this is our first lab we'll just leave this option as default.
Laboratory Signage
The signage for the lab can be accessed at the top of the lab detail page in the same way as the location.
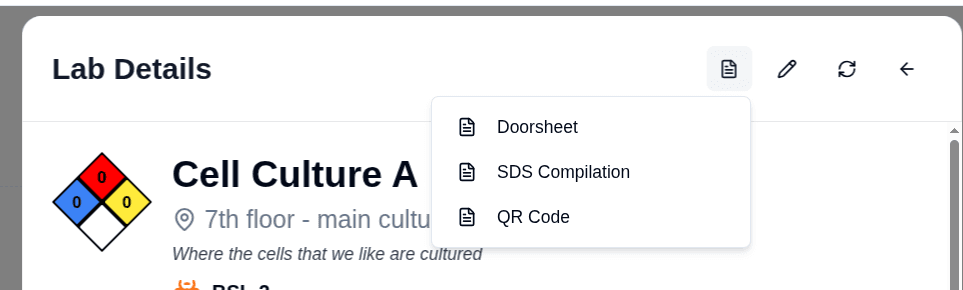
Each lab has a doorsheet and an SDS compilation, and each doorsheet includes a QR code that will bring someone to the SDS compilation page. You are also able to print a full page QR code that links to the SDS compilation. LabBelay hosts all SDS sheets and compilation documents for you and will automatically update these as your inventory changes so you don't have to think about SDS sheet access again.
Editing a lab
You can edit the properties of a lab at any time by modifying it with the edit button at the top of the lab detail page.
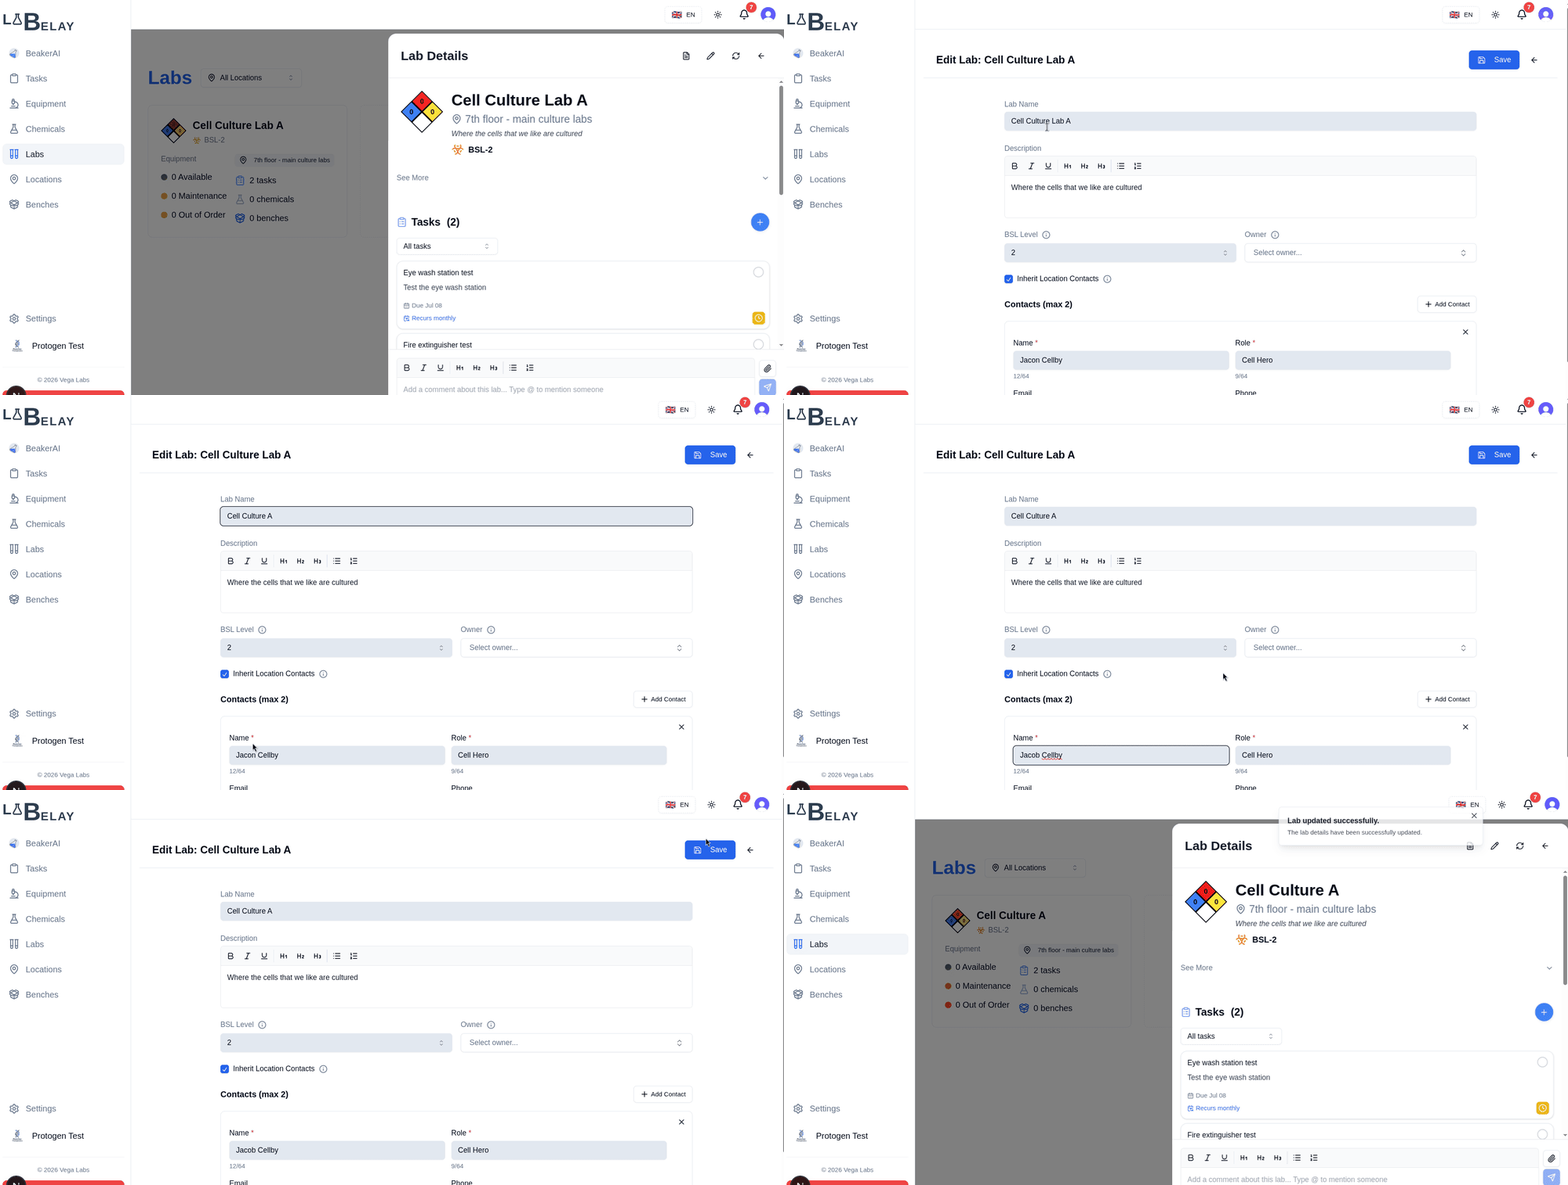
We can change all the values that we created the lab with other than the location. A lab cannot be moved to a new location.
Add lab related tasks
Labs can have tasks associated with them in the same way that Locations do. The lab creation process will have created two tasks for us already, for the fire extinguishers and the eye wash station. We'll leave these two here but creating a new task is the same process as we did with the location previously.
Lab Audit Log
We can scroll to the bottom of the lab detail page and we'll find a log of all of the changes that have been made to the lab, as well as a place to add comments and upload files that are attached to the Lab. You can make a comment, tag someone, or see everything that has happened in the lab from here. We'll go into more detail about the audit log later.
Next Steps
Now that we have a laboratory we have some options.
We can create a specific bench inside of the laboratory to further subdivide and organize the laboratory space. We can also use the lab as is and start adding chemicals and equipment to it. Benches are an optional organizational layer that you can utilize, but they are optional. Where to next?